Calling all image warriors! Buckle up for Day 9's grand finale as we join forces with Black Goku to delve into the realms of preprocessing, segmentation, and postprocessing. Together, we'll not only analyze an image, but also embark on a metaphorical journey, marking our entry into a new timeline of image understanding!
Step 1: Preprocessing - Smoothing the Path
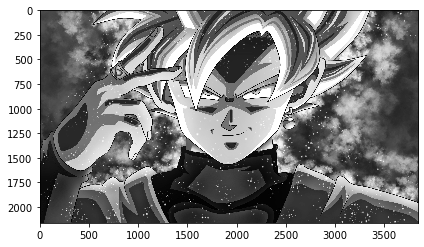
We begin with Black Goku himself, loaded as a grayscale image using
cv2.imread().import cv2 import numpy as np import matplotlib.pyplot as plt from skimage import io from pylab import * img=cv2.imread('../input/blackgoku/black goku.jpg',0)To smoothen out noise and enhance details, we apply two filters:
MedianBlur: Replaces each pixel with the median value of its neighbors, reducing noise while preserving edges (
cv2.medianBlur(img, 3)).BilateralFilter: Combines spatial and intensity similarity for noise reduction while keeping edges sharp (
cv2.bilateralFilter(img, 7, 75, 75)).img_median = cv2.medianBlur(img, 3) img_bilateral = cv2.bilateralFilter(img,7,75,75) figure(0) io.imshow(img) figure(1) io.imshow(img_median) figure(2) io.imshow(img_bilateral) <matplotlib.image.AxesImage
Observe the visual transformations in the displayed figures!


Step 2: Segmentation - Separating Goku's Aura
We isolate Black Goku from the background using thresholding:
cv2.threshold(img_bilateral, 120, 255, cv2.THRESH_BINARY_INV)creates a binary image where pixels above a certain intensity (120) become white (255) and the rest become black.ret, img1=cv2.threshold(img_bilateral,120,255,cv2.THRESH_BINARY_INV) figure(0) io.imshow(img1)

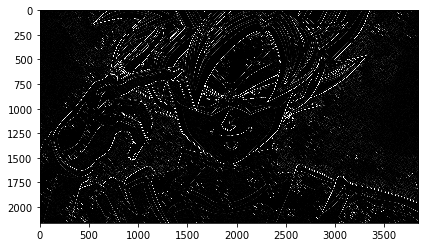
Next, we explore edge detection techniques:
Sobel Operator: Detects horizontal and vertical edges (
cv2.Sobel(img_bilateral, -1, dx=1, dy=1, ksize=5)).img2=cv2.Sobel(img_bilateral, -1, dx=1, dy=1, ksize=5) figure(1) io.imshow(img2)
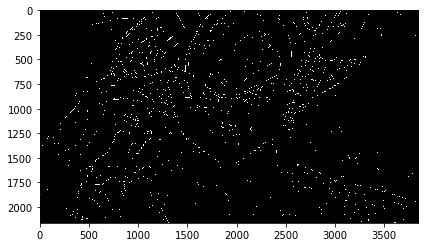
Canny Edge Detector: More sophisticated edge detection (
cv2.Canny(img_bilateral, 120, 255)).img3=cv2.Canny(img_bilateral,120,255) figure(2) io.imshow(img3)
Each technique highlights different aspects of Black Goku's form, offering unique perspectives.
Step 3: Postprocessing - Refining the Saiyan Spirit
We fine-tune the segmented image using morphological operations:
Dilation: Expands foreground objects slightly (
cv2.dilate(img2, SE, iterations=1)).SE= cv2.getStructuringElement(shape=cv2.MORPH_RECT, ksize=(3,3)) img4= cv2.dilate(img2,SE, iterations=1) figure(0) io.imshow(img4)Closing: Closes small gaps within foreground objects (
cv2.morphologyEx(img2, cv2.MORPH_CLOSE, SE)).img5=cv2.morphologyEx(img2, cv2.MORPH_CLOSE, SE) figure(1) io.imshow(img5)Morphological Gradient: Highlights boundaries between foreground and background (
cv2.morphologyEx(img1, cv2.MORPH_GRADIENT, SE)).img6=cv2.morphologyEx(img1, cv2.MORPH_GRADIENT, SE) figure(2) io.imshow(img6)
These operations help refine the segmentation and accentuate Black Goku's powerful presence.
Our journey through preprocessing, segmentation, and postprocessing is complete! We've not only analyzed the image, but also symbolically transformed it, marking our entry into a new era of image exploration.
This Day 9 adventure marks the end of our image analysis journey, but it's just the beginning for YOU! Take these techniques and experiment!
Try different parameters and filters in preprocessing to see how they affect the results.
Explore other segmentation techniques to achieve more precise object isolation.
Combine various postprocessing operations to create unique artistic effects.
Share your creations and insights in the comments! Let's continue to explore the vast world of image processing together.
#Day9 #BlackGoku #ImageProcessing #Segmentation #Postprocessing #NewTimeline
