How Image Processing Revolutionizes Data Science -( Day 3)
Dive into the Pixel Olympics - Color Games Begin!! 😀
Get ready to channel your inner Olympic spirit, because today we're taking image processing to the color podium! Buckle up as we explore fascinating techniques to manipulate, isolate, and create stunning visual effects using Python's imageio and matplotlib libraries.
Unveiling the Image:
- Let's import the necessary libraries:
import imageio
import matplotlib.pyplot as plt
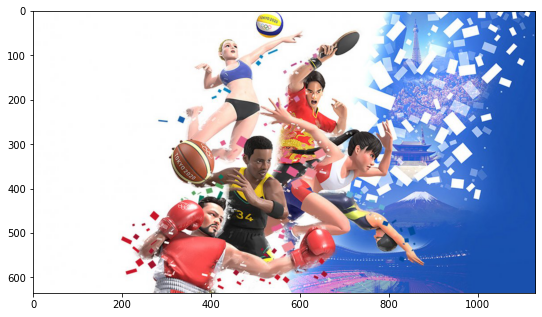
img = imageio.imread('../input/olympics/13025_Olympic-Games-Tokyo-2020-Computer-art-design.jpg')
plt.figure(figsize=(9,6))
plt.imshow(img)
Understanding Image Dimensions:
- Print the image's data type, shape, and dimensions:
Python
print('type of image:', type(img))
print('image shape:', img.shape)
print('image height:', img.shape[0])
print('image width:', img.shape[1])
print('color channels:', img.shape[2])
This reveals valuable information like its height, width, and the number of color channels (usually 3 for RGB).
image height 635
image width  1130
image deimen  3
Delving into RGB Channels:
- Print the maximum (i.e. 255) and minimum RGB (i.e. 0) values:
print('max RGB value:', img.max()) #255
print('min RGB value:', img.min())  #0
- Print individual channel values at a specific pixel (e.g., 100th row, 100th column):
print('R channel:', img[100, 100, 0])
print('G channel:', img[100, 100, 1])
print('B channel:', img[100, 100, 2])
value of R channel 255
value of G channel 255
value of B channel 255
These demonstrate how color information is stored within the image.
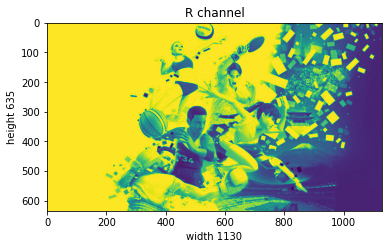
Visualizing Channels:
- Separate and display each color channel as individual images:
#R channel color
plt.title('R channel')
plt.ylabel("height {}".format(img.shape[0]))
plt.xlabel("width {}".format(img.shape[1]))
plt.imshow(img[:, :, 0])
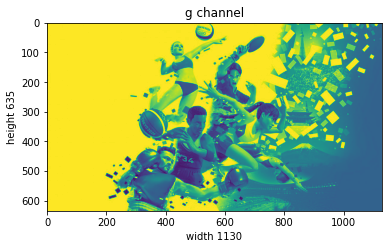
#G Channel
plt.title('G channel')
plt.ylabel("height {}".format(img.shape[0]))
plt.xlabel("width {}".format(img.shape[1]))
plt.imshow(img[:, :, 1])
#B Channel
plt.title('B channel')
plt.ylabel("height {}".format(img.shape[0]))
plt.xlabel("width {}".format(img.shape[1]))
plt.imshow(img[:, :, 2])
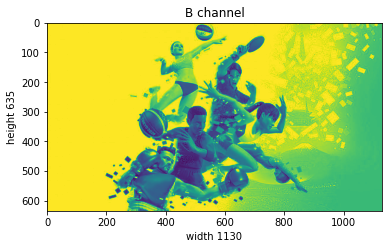
This visualizes the contribution of each channel to the overall image appearance.
Manipulating Colors:
- Experiment with modifying pixel values to create effects:
img[200:300, :, 0] = 255  # Set Red channel in rows 200-300 to white
img[350:400, :, 1] = 255  # Set Green channel in rows 350-400 to white
img[500:600, :, 2] = 255  # Set Blue channel in rows 500-600 to white
plt.imshow(img)
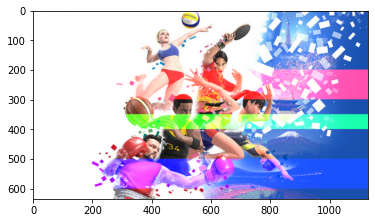
Observe how changing specific channel values alters the image's colors.
- Modify entire columns instead of rows:
img[:, 850:1000, 0] = 255  # Set Red channel in columns 850-1000 to white
img[:, 250:400, 1] = 255  # Set Green channel in columns 250-400 to white
img[:, 400:600, 2] = 255  # Set Blue channel in columns 400-600 to white
plt.imshow(img)
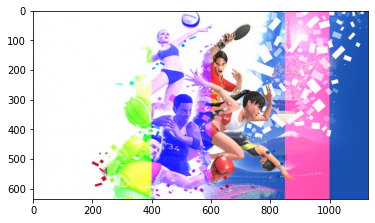
Explore different modifications to create unique effects.
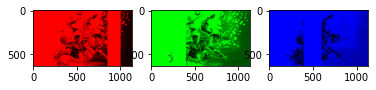
Isolating and Combining Channels:
- Create images with only one dominant color by setting other channels to zero:
# Red dominant
r = img.copy()
r[:, :, 1] = r[:, :, 2] = 0

# Green dominant
g = img.copy()
g[:, :, 0] = g[:, :, 2] = 0

# Blue dominant
b = img.copy()
b[:, :, 0] = b[:, :, 1] = 0

# Display side-by-side
plt.subplot(1, 3, 1)
plt.imshow(r)
plt.subplot(1, 3, 2)
Embrace Your Inner Color Alchemist!
This is just the beginning of your image processing journey. Experiment with different pixel-level editing techniques, explore new color combinations, and create your own artistic masterpieces. You can:
Challenge yourself: Manipulate specific sections of an image, extract objects, or add creative filters.
Go beyond RGB: Explore other color spaces like HSV (Hue, Saturation, Value) for even more dynamic control.
Share your creations: Join online communities, showcase your work, and inspire others!
Remember, image processing is an open playground. Unleash your creativity, keep learning, and have fun!
P.S.:
Don't hesitate to ask questions or share your color experimentation adventures in the comments below.
Stay tuned for Day 4, where we'll delve deeper into image transformations and unleash even more powerful tools!